
Working with the Frogwatch Meter
This page helps you get started with Frogwatch quickly. We show you step by step how to start up the meter and set it up to measure.
Looking for more detailed information? Under Hardware in the menu you will find more information about the equipment. Under Dashboard we go deeper into the options the Frogwatch Dashboard offers.
Does something go wrong, or do you get stuck during one of the steps? You can always contact us.
Logging in to the Frogwatch Dashboard
When you buy a Frogwatch Meter for the first time, an account is created for you on the Frogwatch Dashboard. You will receive an email with a link to set your password.
In the Organization menu you can add extra user accounts yourself, and add things like contact details and a company logo.
Haven't bought a Frogwatch yet, but curious what it looks like? Take a look at the Free demo dashboard. Log in with demo@jitter.company, password demo.

The Frogwatch equipment

The Frogwatch Meter comes as standard with the replaceable Battery Pack. It is normally charged enough to get started right away. The meter can also be powered through the 12V power adapter.
Have you received the Frogwatch equipment shown above? Then it's time to get started!
Turning on the Frogwatch Meter
- Log in to the Frogwatch Dashboard and click
Devicesin the main menu for an overview of all meters in your organization. - Open the lid of the meter and connect the battery.
- The green LED blinks briefly, after which both LEDs light up at the same time. Within a few seconds one of the LEDs goes out and the system has started.
- One of the LEDs stays on for about 10 seconds to show the status of the measurement. In the meantime the sensor looks for an internet connection.
- After a while you will see the status update on the Dashboard. Under
Last Updateyou can see when the sensor last came online. - The status of the system is now probably
no config. This means that the meter has not yet been configured with measurement settings.
It can take a while for the meter to come online. Not working? Check the frequently asked questions or contact us.
Configuring the Frogwatch
Now that the meter has started, we can set it up to start a measurement:
-
Create a new project.
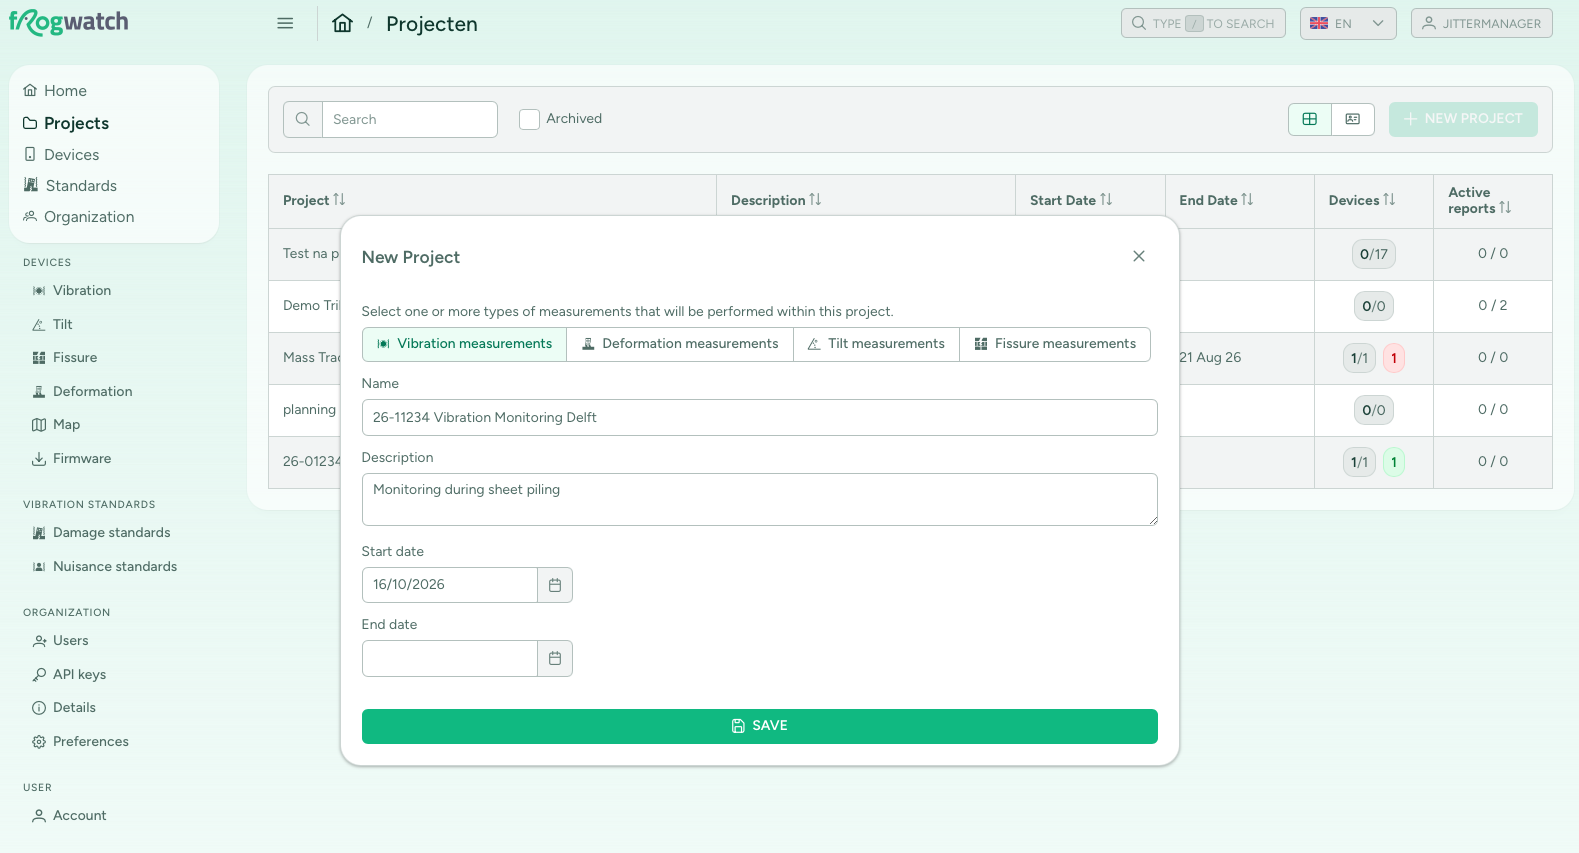
-
In the project, go to
Measurement Config. ClickNEW CLUSTERand thenNEW MEASURING POINT. If you like, give the measurement point a name that describes the measurement location well. -
Choose the meter under
Sensorand confirm your choice by clicking the link symbol. The meter is now linked to the measurement point.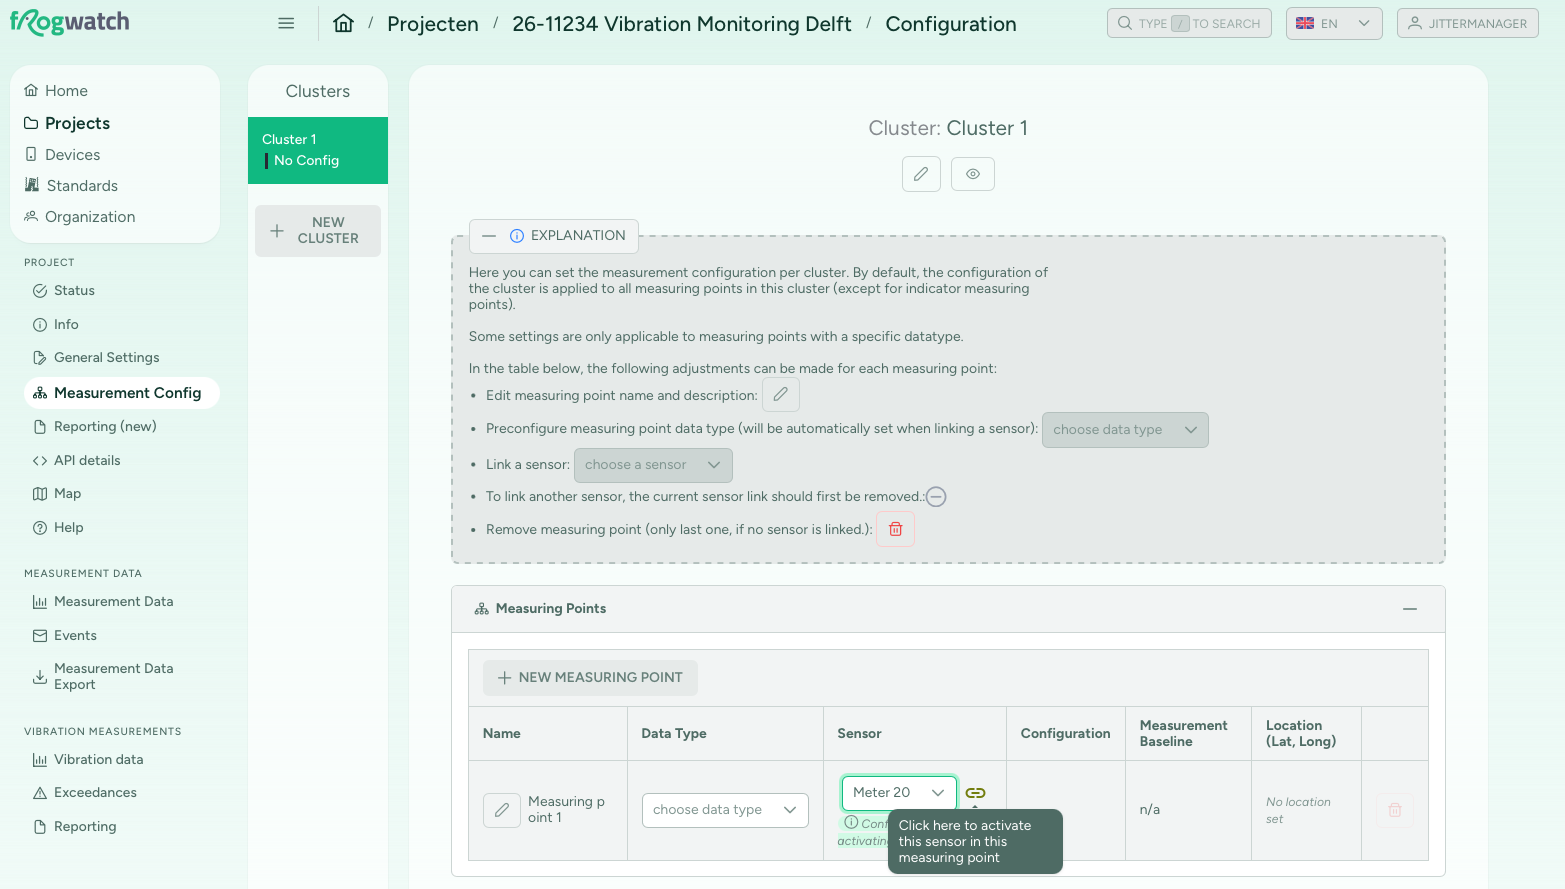
-
Click
CONTINUOUS MEASUREMENT, chooseStructural Damage Monitoring Velocity (SBR A/C)under Measurement method, and clickSAVE.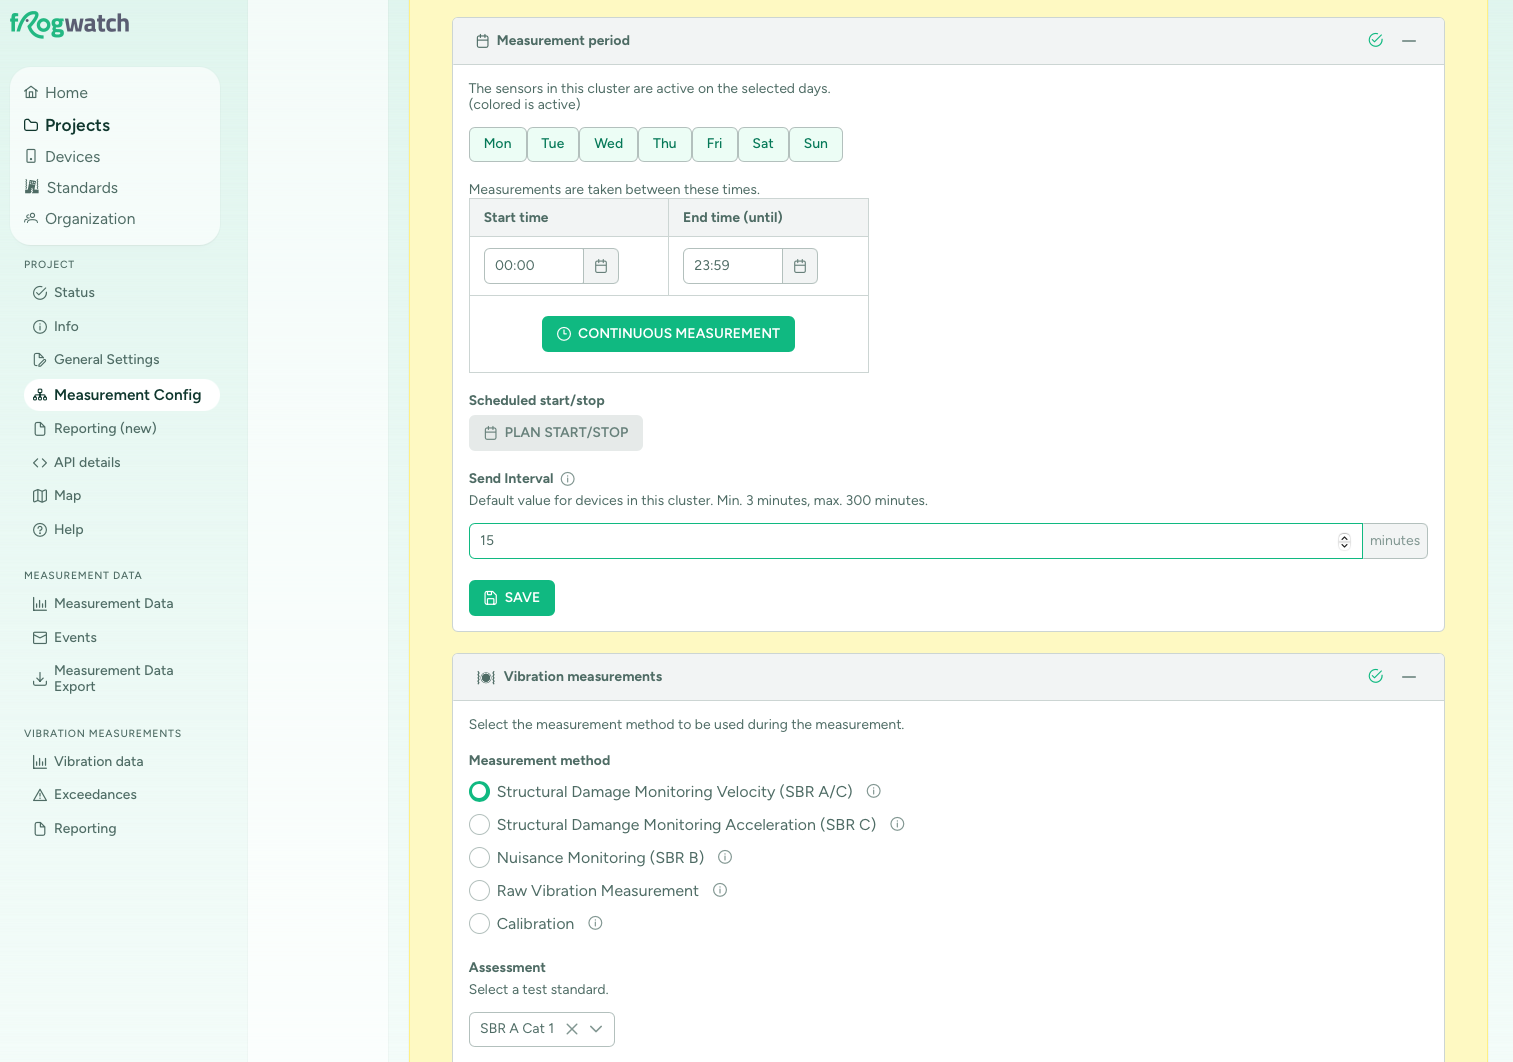
-
As soon as the meter has received the new configuration, you can start the measurement. In the project, go to
Statusand clickSTART.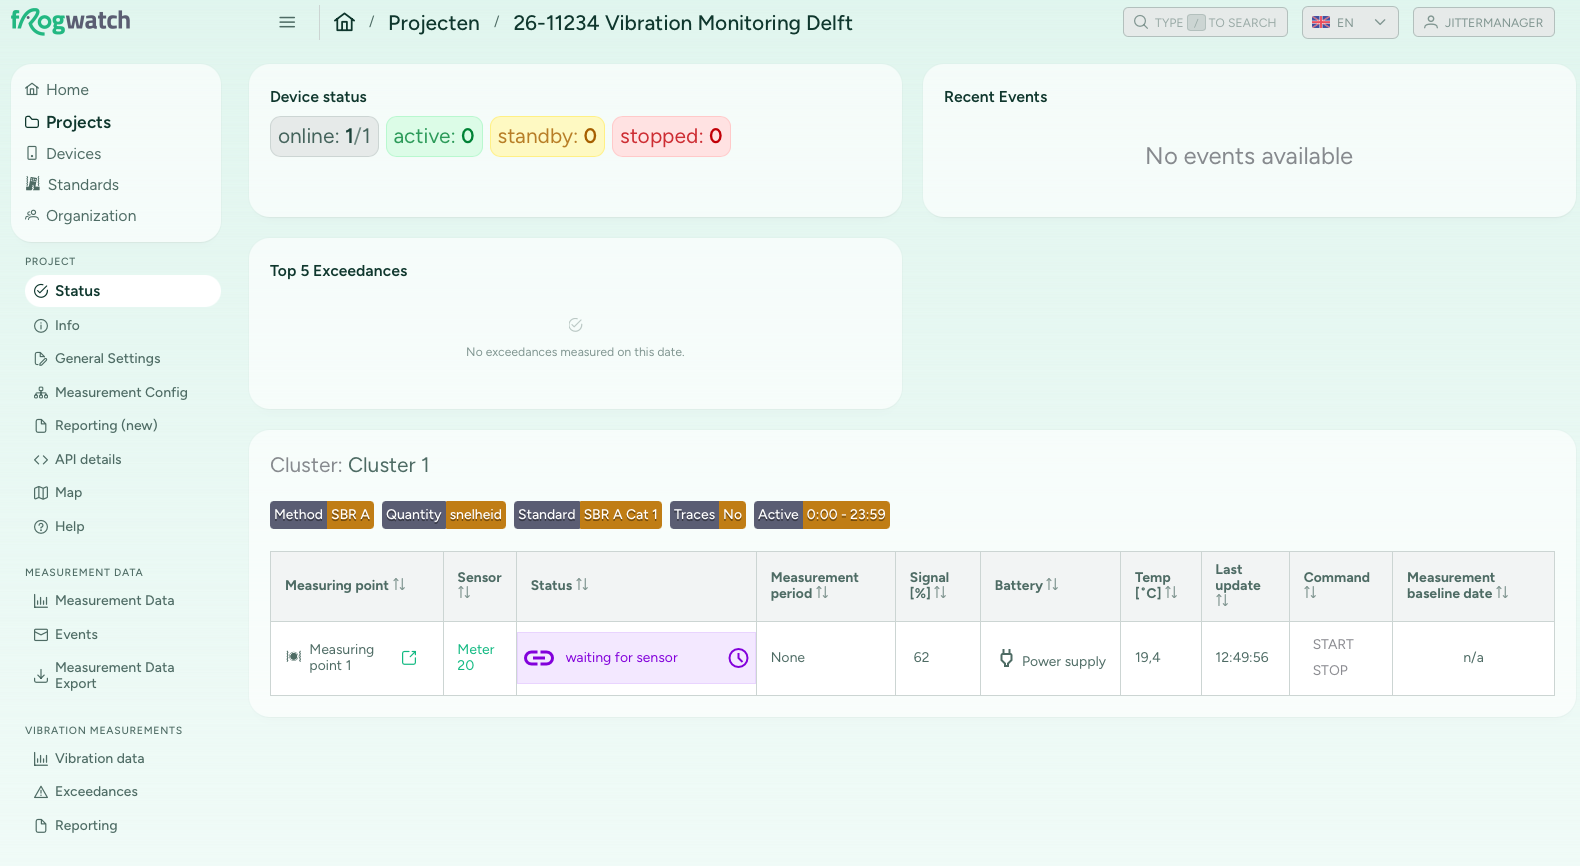
-
As soon as the meter comes online again (how often this happens is configurable), the sensor starts measuring and the status changes to
active. Tip: briefly press the button on the meter. It will then connect to the dashboard immediately, so you don't have to wait as long.
If everything went well, you have just started your first measurement!
Now that the meter is active, the vibrations are measured and sent periodically to the Frogwatch Dashboard. In the Dashboard documentation you can find more information about all the options, such as Vibration standards, Automatic reports and much more.